
Let there be light: and there was light.


Correct setup of planetary imaging cameras
Do camera parameters really matter?
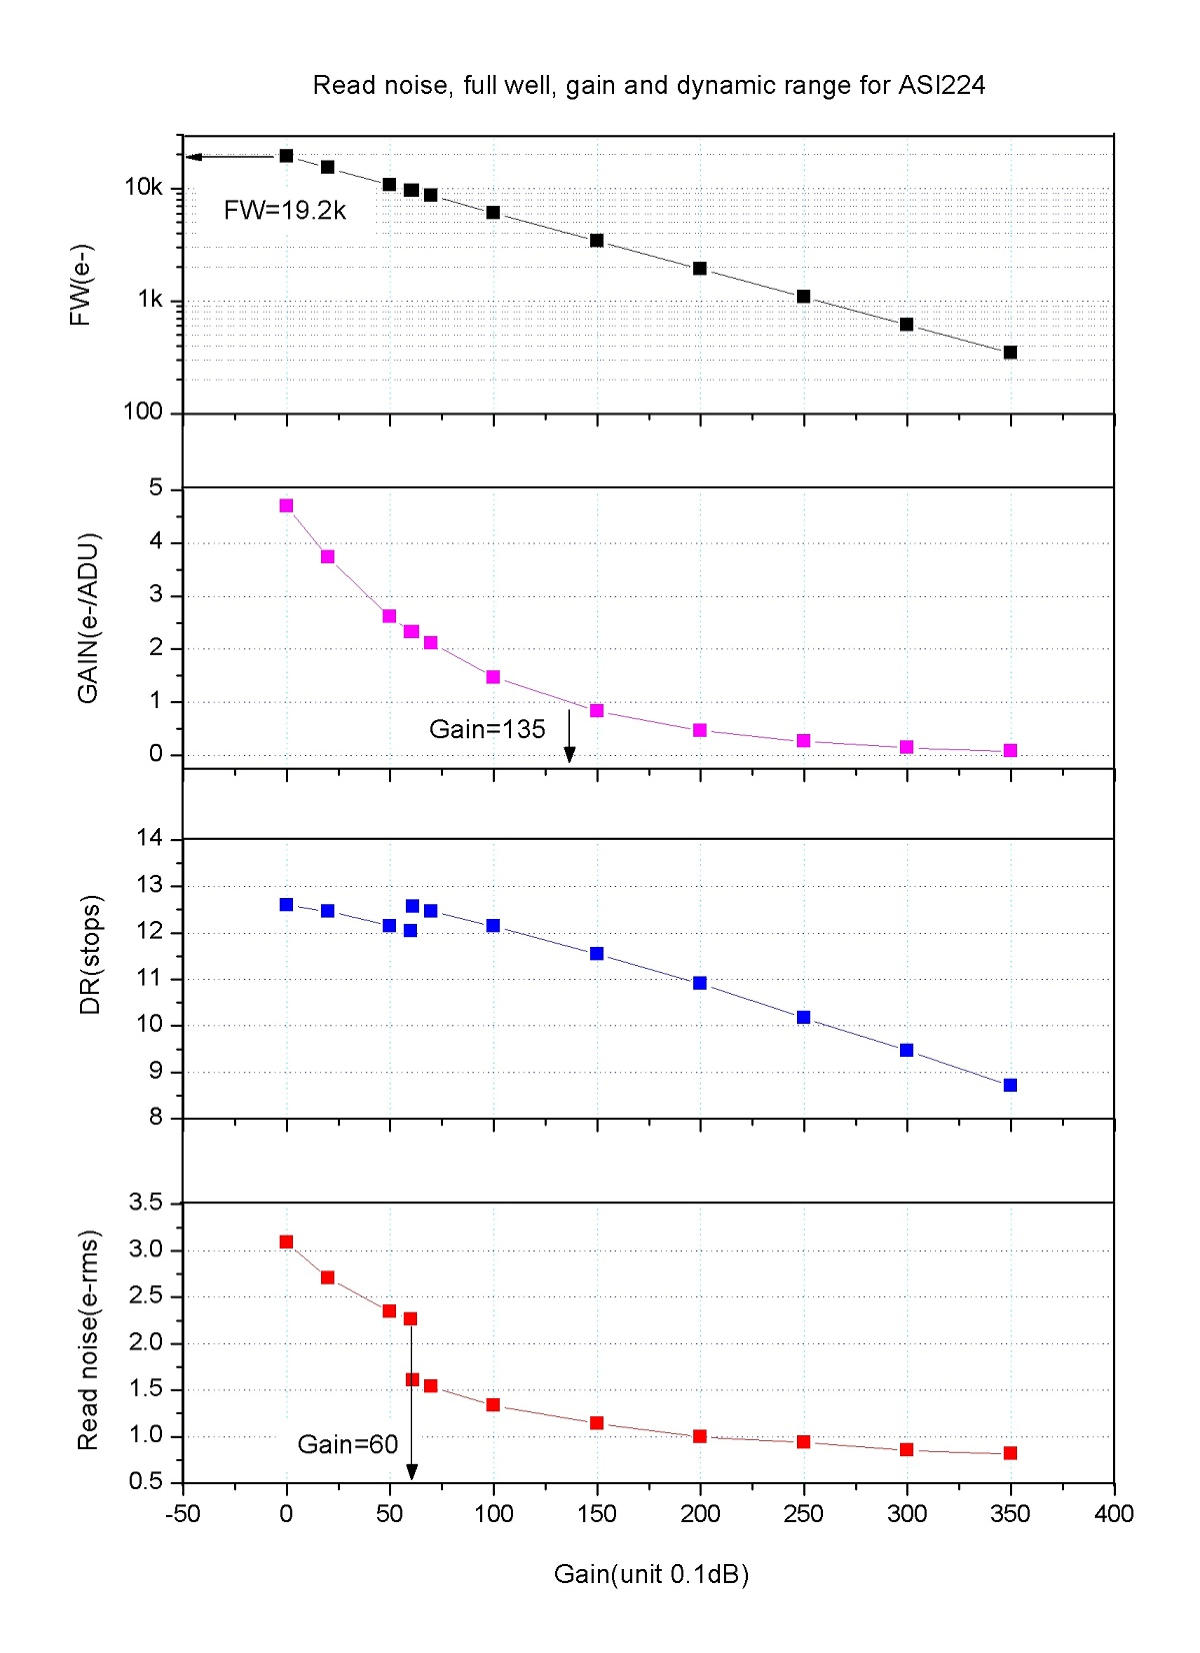
In planetary imaging, it is often said, high frame rates with the benefit of capturing as many frames as possible is the one and only key to succesful lucky imaging. In this article, we want to dive a bit deeper and evaluate the effect of different camera settings on the final image result. For that series of experiments, Mars was captured in several consecutive runs at the same night without any change of focus or image scale within a time frame of less than ten minutes from the preconditioned dome at Juniper Hill Observatory, assuring, that both the dome climate and the imaging train were in complete thermal equilibrium. Optical setup The optical setup was a 190mm (7.5“) Maksutov Newtonian combined with a Televue 5x powermate. In addition, a Baader IR/UV block filter was used to limit the captured spectrum to VIS only, avoiding blur due to miisfocused NIR. As imaging camera, a ZWO ASI 224 MC color camera was used to avoid any influence caused by derotation processes necessary in LRGB-imaging sequences using a monochrome camera. The effective focal length of this setup was about 6600mm or f/35 for the given aperture. The images were later stacked with a drizzle factor of 1.5x to increase the visibility of small albedo structures. Note, that the apparent diameter of Mars during capture was 14.2 arcsecs. Capture interval was Jan-03-2023 from 18:10 to 18:16 UTC. Test scenario The test scenario should answer one basic question: Is it better, to go with a minimum exposure time and highest possible fps at the cost of high gain, higher noise and lower dynamic range or go the oppsite way with low gain for a maximum dynamic range with lowest noise, but high exposure time and low fps. Let‘s first look at the camera charactersitics, so that we can later understand the third capture scenario of this test:

Source: https://astronomy-imaging-camera.com/
We have chosen the following scenarios for high and low gain:
1
.
High gain:
Gain = 325, exposure time = 6.675msec, fps = 149, total frames = 18000 (120sec)
2
.
Low Gain:
Gain = 153, exposure time = 44.51msec, fps = 22, total frames = 2700 (120sec)
As
the
camera
is
-
as
is
typical
for
modern
CMOS
planetary
imagers
-
operated
in
High
Speed
mode,
the
ADC
runs
on
10bit
resolution
instead
of
12bit.
If
you
check
the
blue
curve
above
(DR
stops),
you
can
see,
that
with
the
high
gain
settings
of
Gain=325,
you
have
a
dynamic
range
of
9bits,
whereas
in
our
low
gain
scenario,
at
Gain=153,
you
haver
nearly
12bits
of
dynamic
range.
So
in
low
gain,
your
noise
is
below
the
sampling
threshold,
whereas
in
the
high
gain
scenario,
the
noise
affects
the
2
LSBs
of
the
sampling
process.
An
optimum
gain
could
be
around
a
value
of
250
with
a
DR
of
10bits,
where
the
SNR
perfectly
matches
the
ADC‘s
resolution.
So
we
have
a
third
scenario:
3. DR10 gain:
Gain = 250, exposure time = 16.13msec, fps = 61, total frames = 7500 (120sec)
Let‘s first have a look at the quality graphs of the three scenarios:
1
.
High Gain:
2. Low Gain:
What
can
clearly
be
seen,
is,
that
in
the
high
gain
scenario
you
are
facing
a
quite
steep
quality
graph
with
lots
of
frames
with
poor
quality,
but
with
much
more
frame
than
in
the
low
gain
scenario.
The
low
gain
scenario
shows
a
relatively
flat
quality
graph
with
lots
of
frames
being
about
a
certain
quality
threshold:
this
is
mainly
due
to
the
fact,
that
the
associated
long
exposure
times
average
out
high
frequency
seeing
effects,
resulting
in
less
sharp,
but more consistent frames.
Let‘s now see the compromise scenario, whre SNR is matched to the ADC resolution:
3. 10DR Gain:
As to expect, the quality graph lies somewhere in between the scenarios 1 and 2.
As
a
next
step,
each
of
the
three
scenarios
has
been
stacked
with
a
frame
selection
rate
of
15%,
and
then
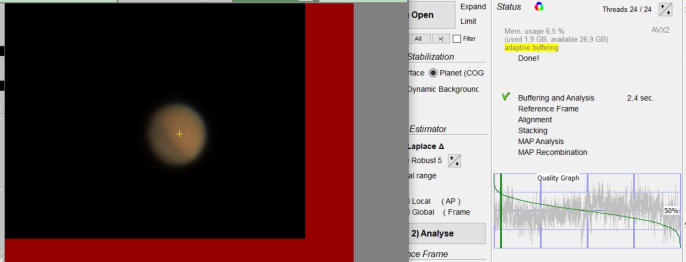
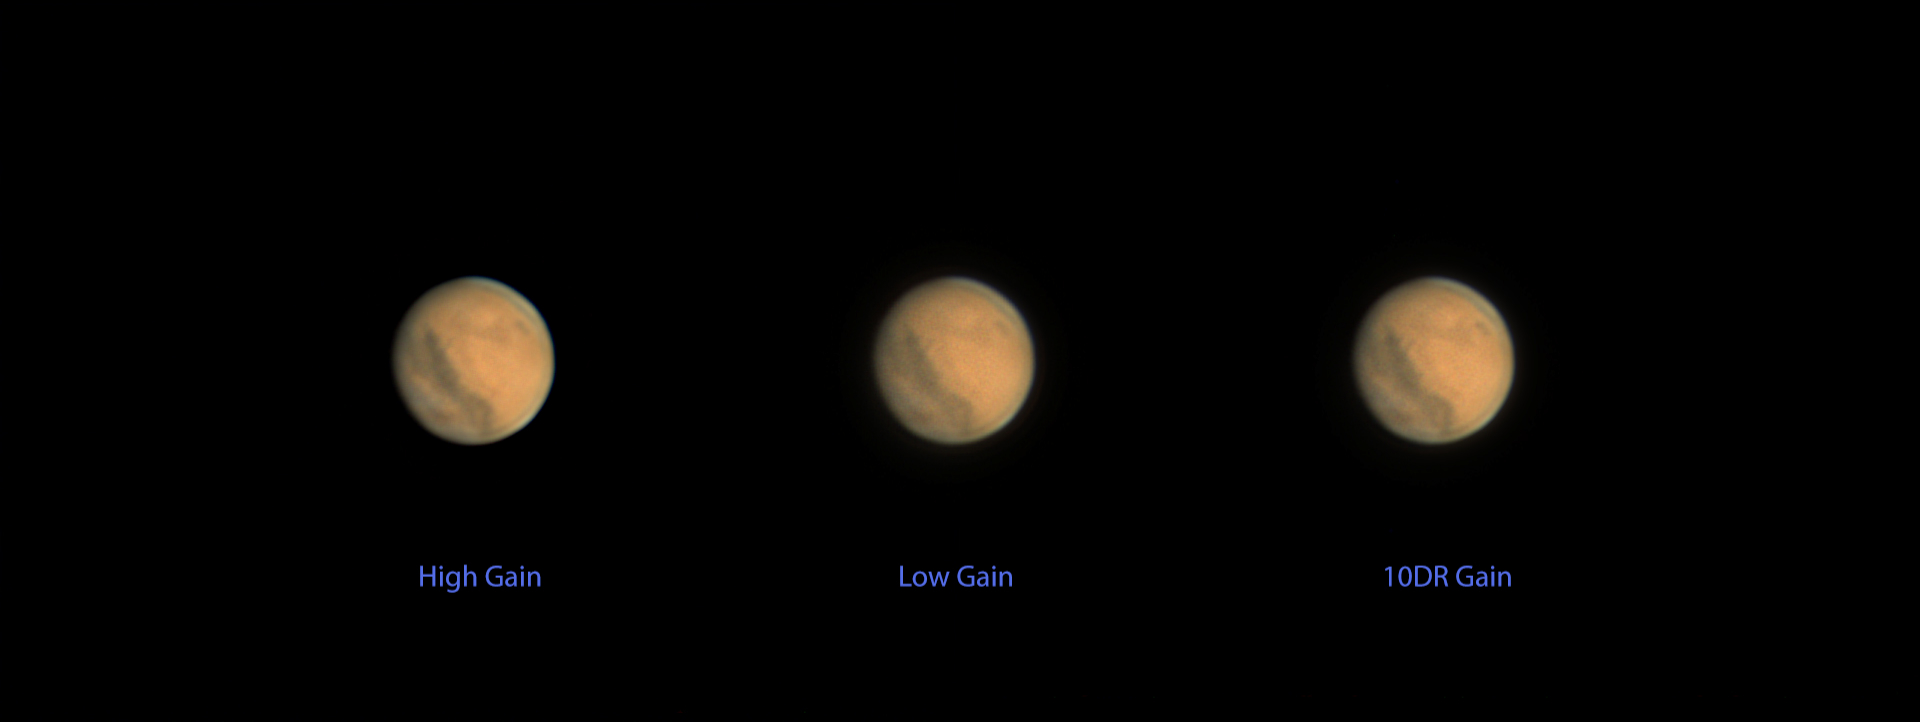
sharpened using Registax wavelets. The result can be seen in the following image. Klick for a 100% view:
The
clear
winner
here
is
the
10DR
Gain
scenario,
with
the
Gain
adjusted
to
match
the
10bit
resolution
of
the
ADC.
It
shows
at
least
the
fine
details
of
the
High
Gain
scenario,
but
with
the
smoothness
and
clarity
of
the
Low
Gain
scenario, where the latter is missing the finest detail due to long exposure times.
To
be
honest,
the
differences
are
quite
subtle,
so
neither
imaging
scenario
is
a
real
show
stopper
and
it
might
make
sense,
to
chose
the
parameters
in
a
way
to
best
meet
the
circumstances
(seeing,
focla
length,
pixel
size
etc.)
of
your
imaging
setup.
But
in
general,
reducing
the
gain
to
a
value
of
10bits
DR
drastically
reduces
disk
space
and
processing
time
and
yields
cleaner
and
more
detailled
results
than
sampling
too
fast
using
high
gain
values.
What
definitely
should
be
avoided,
is
to
shorten
exposure
times
below
the
frame
rate
that
your
camera
can achieve with the selcted ROI.
For
example,
if
your
camera
supports
100fps
at
an
ROI
of
800x600
pixels,
it
makes
no
sense
to
push
your
exposure
below
10msec:
you
do
not
get
more
frames
but
you
get
considerably
more
noise
and
lower
dynamic
range.
So
take
1/max{fps}
as
your
minimum
exposure
time
and
try
to
limit
your
gain
to
a
value
giving
you
10
stops of dynamic range.
If
your
planetary
camera
supports
high
conversion
gain
mode
(this
is,
where
the
readout
noise
drops
at
a
certain
gain value) NEVER do planetary imaging with gain values below the HCG mode.
With
that
points
considered,
one
can
achieve
a
maximum
detail
level
in
planetary
imaging
without
generating
excessive amounts of data.